

TIPS FOR KEEPING YOUR CHEF KNIVES SHARP – Knife sharpening and maintenance
Keeping your knives sharp is one of the most important rules in a kitchen. It not only makes food preparation faster and cleaner but far safer than using a dull knife. Using a dull knife requires more pressure therefore it can cause quite a mess if it slips.
A sharp knife is less likely to slip and cause a bloody mess. In the event that you actually cut yourself by accident, it will be less painful and heal faster than if you were using a dull knife. Knife skills are important for preventing injury, so if you’re not sure how to hold a knife you can see how here.

Most knife sets come with a tool to sharpen (Hone) the knives once they start burring (Dulling). A honing rod is one such tool. It looks like a short round sword and doesn’t remove a lot of metal from the blade but lines up burs on the knife edge so it cuts better.
You can determine if your knife is a bit dull by choosing a round fruit or vegetable with a slick surface, for example, a green apple. Try cutting the surface using little pressure. If the knife slips off the surface or you have to use a sawing motion, then your knife is too dull. When using the honing rod, you should hold the knife in your dominant hand with the rod in the other hand.
Hold a knife at 18-20 degrees or so to the rod and move its whole length across the top of the rod. Repeat this at the bottom of the rod with the other side of the blade. Do this about 6 or 8 times before using your knife. Remember to go slow at first. You can go faster once you get the hang of it. Be sure to use your honing rod at least once a week to help hone and sharpen your knives.
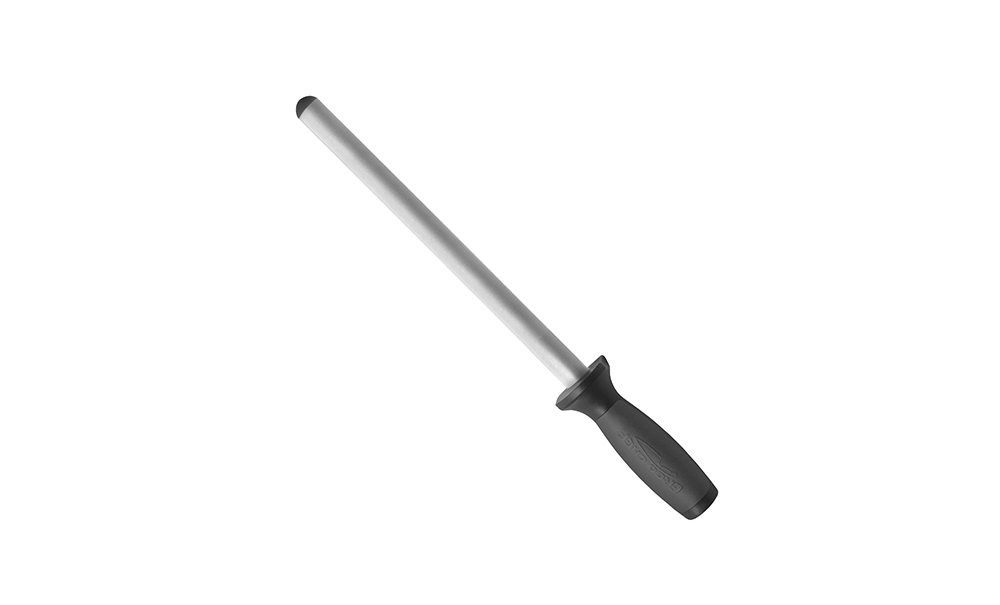
This tool is quick and efficient at keeping your knives edges sharp in between more timely sharpening methods. The oval diamond sharpener is used like the honing rod at an 18-20 degree angle, sweeping the knife on a diagonal very lightly. This removes only a few microns of steel, sharpening your edge with just 3-4 passes per side. If you find this tool doesn’t bring your edge back then it’s time for a whetstone or bringing them into a professional sharpener.

You may not be new to this magical tool. A sharp knife will require a great sharpening stone.. The stone has both a rough and fine side. Start on the rough side 1,000 grit or less, and create a burr. If you have a one-sided edge, you can just grind one side. For a symmetrical grind, it is better to grind both sides.
Once you’re done, turn the stone to the finer 3,000 – 6,000 grit side to smooth out the burrs. Once smooth, keep alternating the sites with every stroke. Your knife should now be sharp. If your knife has chips in the blade you will need a 300 grit wet stone to remove them faster and easier.
This comes in handy when you don’t have a honing rod or any other sharpening tool. By maintaining your knife at 18-20 degrees to the grit of a ceramic mug, you can sharpen your knife by sliding the blade across the grit.
Ina Garten Just Shared Her Favorite Knife Sharpener – Electric Chefs Choice
Food and Wine article describes the test results they got when using the Chef’s Choice electric knife sharpener a favorite of Chef Ina Garten. This is definitely an easy way to quickly sharpen your blades at home. While it won’t grind the full bolster of some knives if needed, it will create a razor edge and even deburr your burred-up edges.
The type of surface on which you cut your food also has a large impact on your knife’s blade life. You should definitely go for a wooden cutting board to ensure your knife holds its edge for a long time. Being soft, wood is generally gentler on the blade than other cutting board surfaces. Bamboo is also a great choice for cutting board and it’s eco-friendly.
This is especially true with cutting boards which have the end grain facing up in a butcher block-style. This design allows the blade to slide in between the wood fibers but for most parts it’s durable.
Plastic boards are also a bit easy on the knife edge and can be easily sanitized.
Don’t Use: Glass or marble cutting boards are too hard for knives and will quickly dull the edge. This also includes ceramic plates. These three surfaces will dull any knife and you should avoid using them.
Tossing chef knives into the dishwasher doesn’t do them any favors. It may be an easy way to wash them but the constant bumping with other silverware and kitchen utensils, along with harsh detergents may leave dents in the knife edge dulling it over time. Not to mention the harsh detergents can start to pit the rivets in the handle and discolor the plastic handles on a knife.
So how should you wash your knives? The best way is to clean them by hand. Use warm water, dish soap and a sponge to wash them and avoid soaking them in order to prevent damaging the handle material and also causing staining or rust spots on the blades. Dry after washing and store in a safe place. Washing a knife after use is a good habit to start and only takes about 1 minute from start to finish. This will help preserve the beauty and life of your knives.
7 Pro Tips: How to Clean a Knife for Best Result – https://meetjosechavez.com/how-to-clean-a-knife/
You should have a dedicated storage place for your chef knives. It’s advisable not to store them in a drawer since this will be a bit dangerous. But if you store yours in a drawer be sure you use edge guards on the blades to prevent knife and finger damage. You can use wooden blocks or knife blocks to have them all in one place. If you need to access them fast, you could always go for a magnetic strip. These are not really safe for homes with kids but are fine for kitchens in restaurants.
A lot of people, even chefs, use knives to scoop up food from the cutting board. This only speeds up the dulling process. Avoid using your knife to cut non-food items such as cardboard and packages, as this also can dull the blade.
That said, taking care of your chef knives should now be easier. With sharper knives, you can enjoy cooking and get a lot done in the kitchen, both safer and faster. By following the steps above, your knives can stay sharp and last even longer.
Please stay up to date with all we offer and our blog by liking us on Facebook Instagram and signing up for new Chop Talk blog post updates.
If you missed our special 20% OFF in July sale good for a single item purchase, we activated 100 more special coupon codes: Choptalk20 valid through Aug. 8th Don’t miss out on this special. Shop now!


6 Responses
Your tips for cleaning knife is very effective. which method is best for sharpening using a honing rod or a sharpening stone?
If your knife blade is dull it will need sharpening. Best way to tell is to use a honing rod first. If this is not effective and your knife still doesn’t cut well you will need to sharpen the blade using a true sharpening rod, like diamond rod, or better yet would be to use a wet stone. If you do not have either you can buy one and watch video on You tube on how to use them correctly or look up a professional knife sharpening service locally or on our site. We do offer professional sharpening and use special ceramic belts and water wheels which results in a razor sharp blade.
It never crossed my mind that chef knives could be harmed if tossed in with the utensils. My mom bought some good kitchen knives that need to be sharpened. I will call a professional and let her know to clean her knives separately from her silverware.
This is one of the best synopses of sharpening theory and practice I’ve ever come across. And I’m a woodworker.
I’ll add something that I do – it’s a quick way to get an edge back, I do it about once a week on my edge tools (less often on my kitchen knives)
I use automotive wet/dry sandpaper on a piece of glass or marble. A spray bottle to keep the surface wet, and the water also helps to hold the paper flat on the glass. A few swipes on the bevel and the back, a couple runs along a strop, and I’ve got a rejuvenated edge. This works well with Kitchen tools too, but it takes a little practice to hold the edge at the proper angle of the bevel on each side of the blade.
Thanks for your tip! Glad you found our post informative.
Stay Sharp!
Thanks a lot for your tips, I really love it.